


Poster sizes explained: choose the right format for wall and furniture
A practical poster-size guide for measuring the usable wall, relating art to furniture and testing a layout before ordering.
The short answer
Choose a poster size from the usable wall field, not from the total wall. Measure the clear area above or beside the furniture, mark the proposed outer dimensions with removable tape, and judge the result from the normal viewing position. For a group, calculate the complete width and height including frames and gaps. The best format is large enough to relate visibly to the furniture, but leaves deliberate empty space around the composition.
Measure the usable wall field
A poster-size guide becomes useful only when it begins with the real room. The total wall width is rarely the same as the usable field. Doors, curtains, switches, lamps, shelves and the sightline from an adjacent room all reduce the area in which art can sit comfortably. Measure the clear width and height, photograph the wall straight on, and note the furniture that will remain. Then decide whether the art should anchor that furniture, connect two zones or stand alone. This sequence prevents a popular format from being chosen before the available space is understood.
Start by drawing one rectangle for the usable wall field. Keep practical clearance from a door swing, curtain, lamp and cabinet top. If the work sits above a sofa, sideboard or bed, measure the furniture as well as the wall. The visual relationship matters more than a universal percentage. A narrow poster can look intentional above a narrow console, while the same poster may appear lost above a long sofa. Use the poster collection to compare orientations, but confirm the exact available sizes on each product page before making a final plan.
Relate the format to the furniture
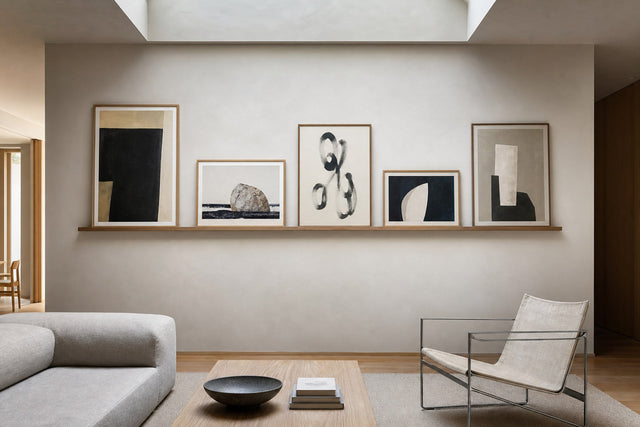
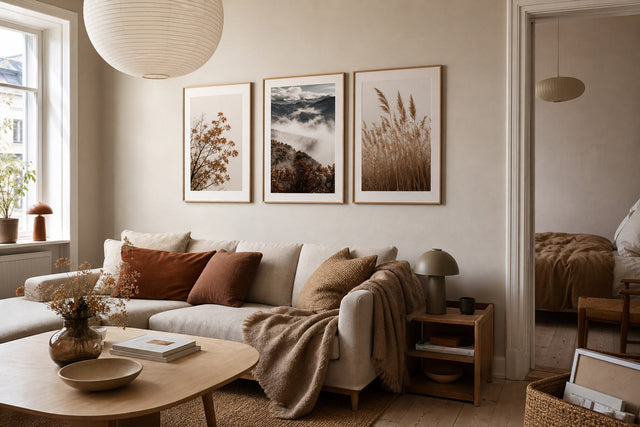
Next, decide what the composition must do. A single large work creates one clear focal point and needs enough empty wall around it. A pair can reinforce symmetry or follow the width of a piece of furniture. Three works can form a calm row or an asymmetric cluster. A larger gallery wall distributes attention and can combine portrait, landscape and square formats. The number of works does not determine the quality of the result. A group succeeds when its complete outer shape, spacing and visual weight are deliberate.
Use removable tape to mark the full outer dimensions, not just the printed paper. Frames add width and height, and a passepartout changes the perceived scale of the motif. Mark one alternative, photograph it from the doorway and the normal seated position, then mark a second alternative. Compare the photographs rather than relying on memory. If the composition seems to float, lower the whole group or increase its scale. If it crowds furniture or architecture, increase the outside margin before reducing every individual piece.
Compare single works and gallery walls
Common formats are useful reference points, not automatic answers. A5 and A4 can support a small shelf, desk or compact cluster. Formats around 30 × 40 cm, A3 and 40 × 50 cm have more presence while remaining flexible. A2 and 50 × 70 cm can work as anchors or as substantial single pieces. A1, 70 × 100 cm and 100 × 140 cm require a generous clear wall and a suitable viewing distance. Product availability varies, so treat these dimensions as planning categories and use the options shown for the chosen work.
Orientation changes how a size feels. Portrait formats draw the eye upward and can suit narrow wall fields. Landscape formats follow long furniture and can calm a wide composition. Square work creates a stable visual stop and can bridge portrait and landscape pieces. When mixing orientations, align a few important edges rather than every frame. Repeating one gap and one frame finish is often enough to make different proportions feel related. The gallery-wall builder can help compare the combined silhouette before the final placement is chosen.
Include frames, gaps and orientation
Viewing distance is part of scale. A detailed work intended for a hallway may be seen close up, while art above a sofa is often judged from several metres away. Stand where the room is normally used and ask whether the motif is readable, not merely visible. Check daylight and evening light for reflections. A larger format does not solve poor lighting, and a smaller format does not automatically create calm. The correct choice makes the artwork legible while respecting the architecture and daily movement through the room.
The six selected works by Ana Rut Bre illustrate how one artist’s varied proportions can support a measured layout. Leaves Summerly Poster, Warm Pastel Geometry Poster, Playing Around Shapes 6 Poster, Friendly Colors2 Poster, Pattern3 Mid Earth 1 Kopie Poster and Summer Circles22 4 V Poster are shown without altering their motifs. They are examples for comparing portrait, landscape and square visual weight, not a claim that every work has identical size options.
Test the decision before ordering
Before ordering, make full-size paper templates from joined sheets or inexpensive paper. Write the product name, orientation and planned outer frame dimensions on each template. Tape them to the wall and leave them in place for a day. Walk past the arrangement, sit down and view it in both bright and low light. This slow test reveals whether a top edge is too high, whether a small work disappears or whether a gap is inconsistent. It also makes later installation more accurate because the approved positions are already documented.
Record the final layout as a simple worksheet: usable wall width and height; furniture width and top edge; outer dimensions of each framed work; horizontal and vertical gaps; lowest and highest point; and the normal viewing distance. Add a front-on photograph with the paper templates. If any product or frame choice changes, update the worksheet before drilling. The customer-service guide can answer general shop questions, while the individual product page remains the source for the concrete options attached to that motif.
Poster-size worksheet
A good scale decision should still look intentional when small objects are removed from the room. Temporarily clear cushions, vases and books that might camouflage an imbalance. Judge the composition against the permanent elements: wall, floor, window, doorway and main furniture. Replace accessories only after the art group works by itself. This method also protects against buying decorative objects simply to connect a poster that is too small, too high or unrelated to the wall field.
Finally, separate aesthetic preference from measurement. You may prefer generous empty wall or a dense salon arrangement; both can work. The measurable part is clearance, outer dimensions, repeated gaps and sightlines. The personal part is rhythm, colour and how much visual energy the room should hold. Lock the measurable constraints first, then compare two layouts that both fit. Choosing between two viable plans is easier and safer than trying to rescue a composition that never matched the room.
- Photograph the wall straight on.
- Measure the clear wall width and height.
- Measure the furniture below the art.
- Note doors, curtains, lamps and switches.
- Choose single work, pair, row or cluster.
- Write the outer framed dimensions.
- Include passepartout and frame depth.
- Choose portrait, landscape or square roles.
- Set one repeated gap for a group.
- Mark the whole boundary with removable tape.
- Make full-size paper templates.
- View the layout from the doorway.
- Check it from the normal seated position.
- Review morning and evening light.
- Remove small accessories during comparison.
- Photograph two viable alternatives.
- Confirm sizes on each product page.
- Update the worksheet if a frame changes.
- Approve the complete group before drilling.
- Save the final measurements for installation.
Artworks used in this guide

Leaves Summerly Poster
Ana Rut Bre
View artwork →
Warm Pastel Geometry Poster
Ana Rut Bre
View artwork →
Playing Around Shapes 6 Poster
Ana Rut Bre
View artwork →
Friendly Colors2 Poster
Ana Rut Bre
View artwork →
Pattern3 Mid Earth 1 Kopie Poster
Ana Rut Bre
View artwork →
Summer Circles22 4 V Poster
Ana Rut Bre
View artwork →Frequently asked questions
Should a poster be centred on the wall or the furniture?
When the poster belongs to a furniture zone, centring it on that furniture usually creates the clearest relationship. Use the wall centre when the work is deliberately independent.
Do frame dimensions count when planning the size?
Yes. Plan with the complete outer framed dimensions and include gaps between works. The printed paper alone is not the final visual footprint.
How can I test a poster size without ordering it first?
Mark the outer boundary with removable tape or use full-size paper templates. View them from the normal positions and in different light before deciding.
Build your wall virtually before you spend a penny
Arrange sizes and layout on a virtual wall — free, before you buy.

Start with these
See the whole collection →


Related inspiration

100-day returns