


How to Create a Gallery Wall: The Complete Guide
A complete step-by-step guide to building a gallery wall, from choosing an anchor piece and spacing frames 5-7 cm apart to planning the whole arrangement digitally before you hammer a single nail.
A gallery wall is the most rewarding project in home decorating: a curated cluster of posters and prints that turns an empty stretch of plaster into the focal point of a room. It costs far less than new furniture, it can be finished in a weekend, and it says more about the people who live in a home than almost anything else in it. Yet most gallery walls go wrong in exactly the same way — prints bought on impulse, frames hung by eye, and a wall of nail holes that never quite adds up to a whole.
The difference between a wall that looks collected and a wall that looks cluttered is not talent, and it is not budget. It is method. This guide takes you through that method from start to finish: how to choose one anchor piece and build outwards, how to find the common thread that holds mixed prints together, exactly how far apart to hang your frames, and the paper-template trick that means you only ever hammer a nail once. Follow it in order and the wall will work — whether you own two prints today or twenty.
Start With One Anchor Piece, Not Ten
The most common mistake is buying a stack of prints in one sitting and hoping they will sort themselves out on the wall. They rarely do. A strong gallery wall grows outwards from a single anchor piece — the largest print in the arrangement and the one that sets the mood for everything around it.
Choose the anchor first and choose it slowly. It should be the piece you would hang even if it had to stand alone: typically a 50×70 cm or 70×100 cm print with a clear personality — a bold abstract, a dramatic landscape, a large botanical study. Its colours become your palette, and its style becomes your compass. Every print you add later has to get along with the anchor, which makes each following decision dramatically easier.
Position matters too. Place the anchor slightly off-centre in your planned arrangement rather than dead centre — just left or right of the middle, at eye level. A perfectly centred anchor tends to make the wall feel rigid, while an off-centre anchor gives the composition movement and leaves natural room for medium and small pieces to balance it on the other side.
Find the Common Thread: Colour, Style or Frame
A gallery wall can mix line art with photography and vintage posters with modern typography — as long as one thread runs through all of it. There are three threads to choose from, and you only need one.
Colour is the easiest. Pick two or three tones from your anchor piece and make sure every other print repeats at least one of them. Style is the second option: all botanical, all black and white, all mid-century abstract — the subjects can vary wildly when the visual language is shared. Frames are the third and most forgiving thread: identical frames can unite prints that have almost nothing else in common, which is why a set of matching oak or black frames is the classic rescue for an eclectic collection.
If you want a starting point, these palettes are hard to get wrong:
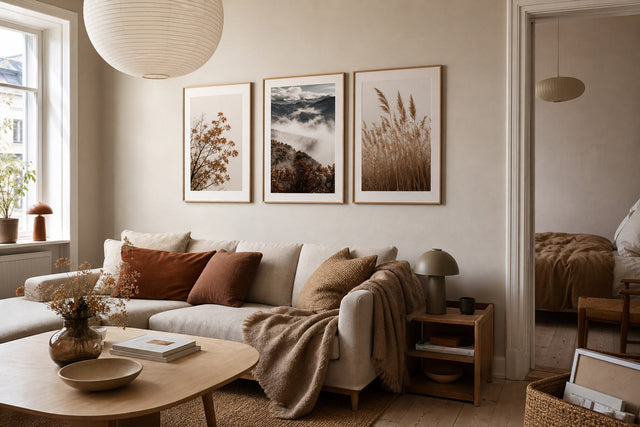
- Warm and earthy: terracotta, rust and burnt orange with cream — pairs beautifully with oak frames.
- Soft Scandinavian: sage green, dusty beige and off-white with pale wood — the backbone of a calm Scandinavian living room.
- Classic contrast: black and white prints with a single muted accent colour, framed in black.
- Cool and quiet: dusty blue, sand and charcoal — works especially well in bedrooms.
Whichever thread you choose, commit to it. A wall with one thread and fifteen prints looks intentional; a wall with three threads and six prints looks accidental.
Choose a Layout That Fits the Wall — Not the Other Way Around
Before you think about individual prints, look at the shape of the space you are filling. Different walls call for different layout patterns:
- The grid: four, six or nine prints in identical sizes (six 30×40 cm prints in two rows is the classic) with identical frames. Formal, calm and ideal above a sideboard or in a hallway.
- The salon wall: an organic cluster of mixed sizes built around an anchor. The most personal look, and the one this guide is really about.
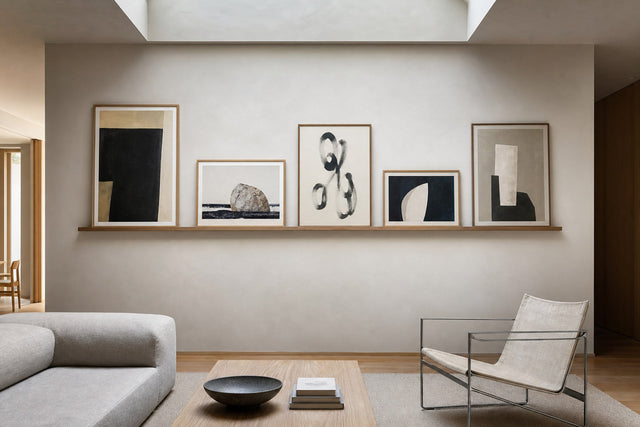
- The horizontal line: three to five prints hung so their centres sit on one line at eye height. Perfect for long, low walls and above beds.
- The staircase cascade: a salon arrangement that steps upwards parallel to the handrail, keeping the centre of the cluster at eye height as you climb.
- The sofa rectangle: a loose arrangement roughly two-thirds the width of the sofa, starting 15–25 cm above the backrest. Wider than that and the wall overwhelms the furniture; narrower and it floats.
Measure the wall before you buy anything and sketch the outer boundary of the arrangement. Knowing you are filling, say, 160 × 100 cm changes every decision that follows — and stops the very common mistake of buying prints that are simply too small for the wall.
Mixing Poster Sizes Without the Chaos
Mixing poster sizes is what gives a salon-style gallery wall its energy, but it needs a system. The one that works is the rule of three sizes: one or two large pieces, a handful of mediums, and a few small accents — and almost nothing else.
In practice, that means an anchor at 50×70 or 70×100 cm, workhorse prints at 30×40 cm doing most of the visual labour, and small 21×30 cm pieces filling the gaps and softening the edges. Three sizes create rhythm; five or six sizes create noise. Odd numbers of prints — five, seven, nine — are also consistently easier to balance than even numbers, because they resist splitting into stiff symmetrical halves.
Balance the weight diagonally rather than horizontally. If your big anchor sits low on the left, place your second-largest piece high on the right, so the eye travels across the arrangement instead of tipping to one side. And resist the urge to align everything: let the outer boundary of the wall stay loose, but keep one quiet line — the top edges of the middle row, or a shared centre line — running through the arrangement so the cluster feels composed rather than scattered.
Gallery Wall Spacing: Why 5–7 cm Is the Magic Number
Spacing is where good gallery walls are won and lost, and the rule is refreshingly specific: leave 5–7 cm between frames, measured edge to edge, and keep that gap consistent across the entire arrangement.
The logic is simple. Closer than 5 cm and the frames start to crowd each other, making the wall feel tense and cramped. Wider than about 8 cm and the prints stop reading as one composition — the eye sees separate pictures that happen to share a wall, and the gallery effect collapses. Within the 5–7 cm band, the cluster holds together as a single visual unit while every print still gets room to breathe.
Fine-tune within the band by scale: large walls with big frames can carry the full 7 cm, while a small arrangement of four or five prints usually looks best at a tight 5 cm. What matters far more than the exact number is consistency — a wall with a uniform 6 cm gap everywhere looks professionally hung, while a wall that drifts between 4 and 10 cm looks improvised, even if every individual print is perfect. Cut a spacer block of cardboard at your chosen gap and use it between every pair of frames on hanging day.
Plan the Whole Wall Digitally Before You Buy
Here is the step that separates a smooth weekend project from an afternoon of second-guessing: plan the entire arrangement digitally before you order a single print. Posterlefi's free Gallery Wall Builder lets you lay out a virtual wall, drop in prints, drag them around, and test sizes, spacing and combinations until the composition clicks — all before anything is printed or paid for.
Use it the way a designer would. Set up the wall, place your anchor slightly off-centre, and build outwards with mediums and smalls, checking the diagonal balance as you go. Swap a print that fights the palette for one that supports it. Try the same layout with 30×40 mediums and then with a second 50×70 — you will see instantly which version the wall needs. Ten minutes of dragging rectangles saves weeks of living with a composition that almost works.
And if you would rather skip the curating entirely, there is a shortcut: browse the ready-made gallery walls, where matched sets of prints have already been composed for you. Pick a set, choose your frames, and go straight to hanging day.
The Paper-Template Trick: Hang Every Frame Right the First Time
Never let the first hole in the wall be a real one. The paper-template trick is the old framer's method, and it works every time. Trace each frame onto kraft paper, baking paper or newspaper, cut out the shapes, and label each one with the print it represents. Then tape the templates to the wall with masking tape, using your digital plan as the map and your cardboard spacer to keep the 5–7 cm gaps honest.
Now live with the paper wall for a day. Walk past it in morning light and evening light, look at it from the sofa and from the doorway. Adjustments at this stage cost nothing — slide a template 3 cm left, swap two positions, drop the whole arrangement a touch lower. When the layout feels right, mark the nail position straight through each template (measure the drop from the top of the frame to its hanger first, and mark that point on the paper), tap the nail through the paper, and tear the template away. Every frame goes up exactly where it should, and your wall carries precisely as many holes as it has pictures.
Hanging Day: Height, Order and the Final Touches
Hang the anchor first, and hang it so the centre of the overall arrangement — not each individual print — sits at about 145 cm from the floor, the standard eye-level used in galleries. Above furniture, let the furniture set the height instead: 15–25 cm above a sofa back or headboard keeps the wall visually connected to the room.
Work outwards from the anchor, one frame at a time, checking each with a spirit level and the spacer block before moving on. Frame choice deserves a final thought here: Posterlefi's wooden frames come in 14 colours and 13 sizes, so the frame thread of your composition can be as uniform or as varied as the plan calls for — a single colour for a calm grid, or two alternating tones (black and oak is the classic pairing) for a livelier salon wall. The prints themselves come on premium 200 gsm or 230 gsm poster paper, which sits flat and true in the frame — a small detail that makes a visible difference across a wall of a dozen pictures.
Then stop. A gallery wall does not need to be finished in one go — in fact, the best ones never quite are. Leave a little room at the edges for the print you have not found yet, and let the wall grow with you.
Frequently Asked Questions About Gallery Walls
How far apart should pictures be on a gallery wall?
Leave 5–7 cm between frames, measured edge to edge, and keep the gap identical across the whole arrangement. Use the tighter end for small clusters and the wider end for large walls with big frames. Consistency matters more than the exact number — cut a cardboard spacer and use it between every pair of frames.
How do I start a gallery wall from scratch?
Start with one anchor piece — the largest print, usually 50×70 or 70×100 cm — and choose it before anything else. Its colours and style become the brief for every print you add afterwards. Then build outwards with medium 30×40 cm prints and small 21×30 cm accents, balancing the visual weight diagonally across the arrangement.
Do all the frames on a gallery wall need to match?
No — but something has to. If your prints are varied, matching frames are the easiest way to unite them; if your prints already share a palette or style, you can mix two frame colours (such as black and oak) for a more collected look. Avoid mixing more than two or three frame finishes, as the frames start competing with the art.
How high should a gallery wall be hung?
Aim for the centre of the overall arrangement to sit at about 145 cm from the floor — standard gallery eye-level. Above a sofa or headboard, hang the lowest frames 15–25 cm above the furniture instead, so the wall and the furniture read as one group. On staircases, keep the centre of the cluster at eye height as it steps upwards with the handrail.
How many prints do I need for a gallery wall?
You can start with as few as three and grow from there — a gallery wall never has to be finished in one day. Odd numbers (five, seven, nine) are easier to balance than even ones, and three sizes are usually enough: one or two large, several medium, a few small. Plan the full arrangement first, then buy in stages if you prefer.
Ready to build yours? Plan the layout, pick your thread, and start with a piece you love — the bestselling posters are a natural place to find an anchor the rest of the wall can grow around.
Build your wall virtually before you spend a penny
Arrange sizes and layout on a virtual wall — free, before you buy.

Start with these
See the whole collection →


Related inspiration

100-day returns